Improving a photo in Snapseed app
How to improve your smartphone image after it has been taken? Among many apps featuring filters and manual tweaks Snapseed is a classic in many ways.
Look at the image I have taken with the iPhoneX:

I was aiming at the centro-symmetrical image. It turned out OK, but a little bit dull. Also, on a sunny day I had a hard time seeing the screen, so the post on the left-hand side got accidentally included.
Now our task would be to add more live to the image and to crop the post on the left. We will use Snapseed app to do the job.

Snapseed opens up with the gray screen and a PLUS button in the center.
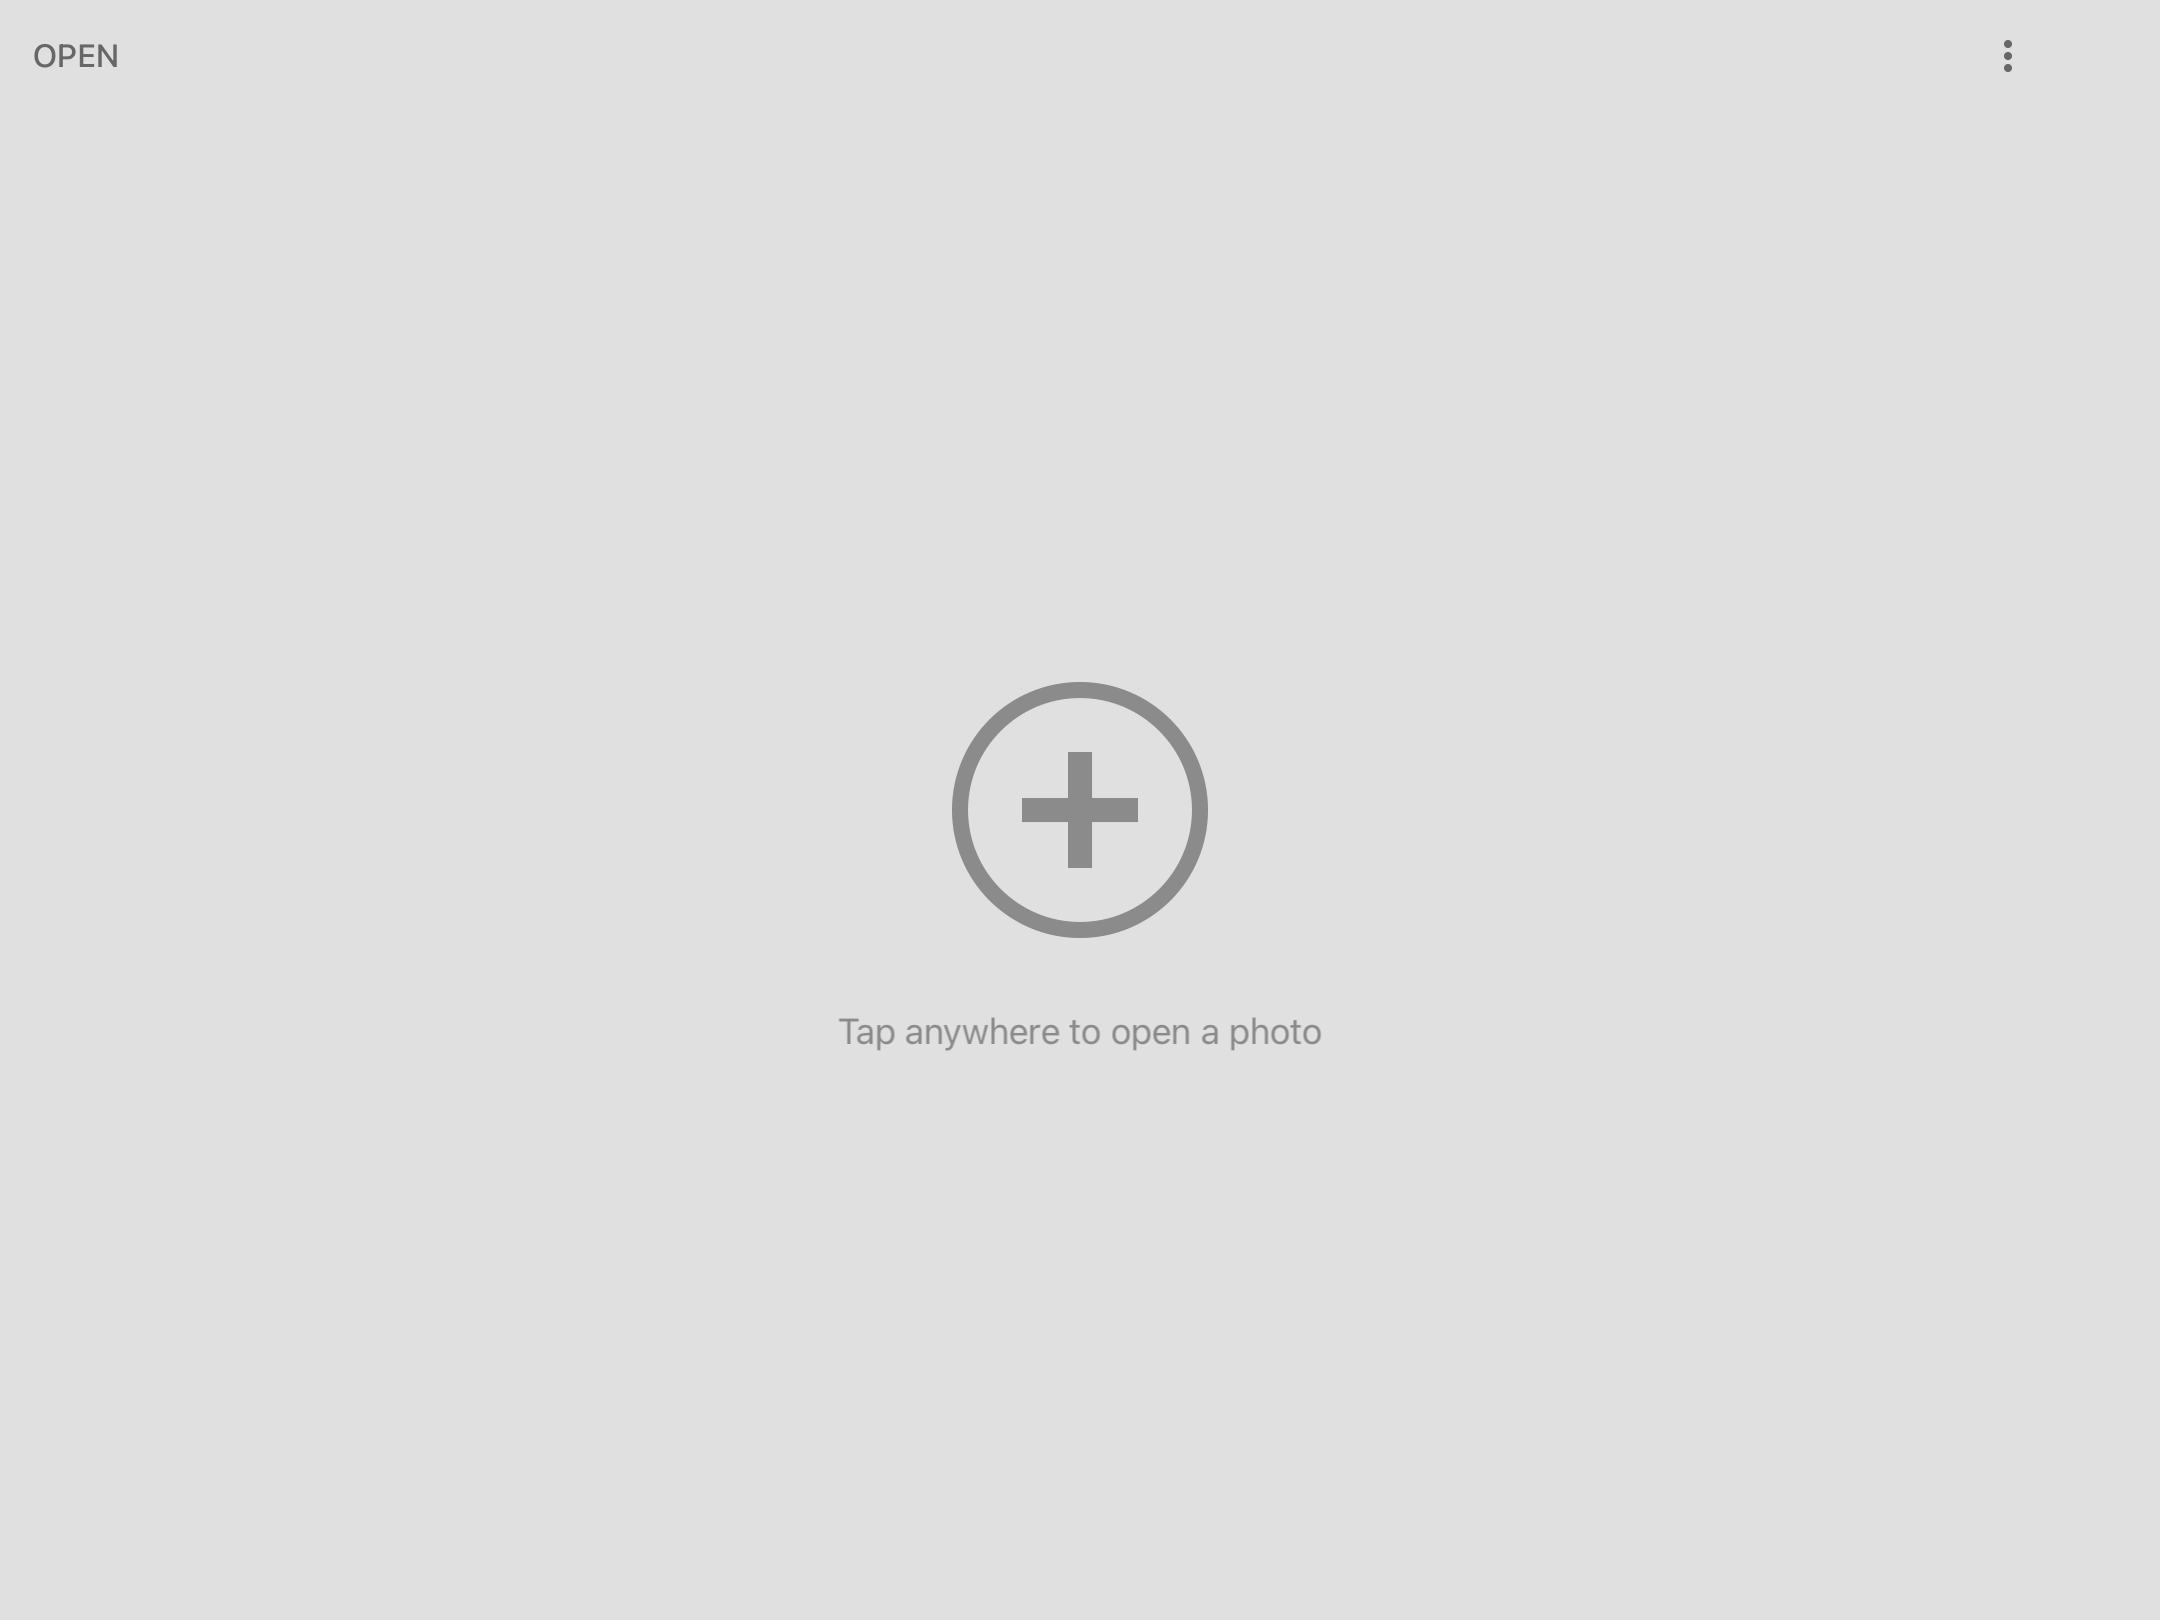
Tap on the screen to open a photo from your Camera Roll.

After you have opened the photo in the app, there are two main editing choices: filters and manual tweaks. Let's do the filters first. Click on the double-arch button on the top right.

Now you have a list of available filters on the right hand side. You can scroll up and down and click on any filter icon to immediately see the result. For the first task of making the image look more vivid I would go straight ahead to either POP or ACCENTUATE filter. You can see the difference with the ACCENTUATE filter. Play with the filters to see which one works well for your creative output.

You can see below the MORNING filter. This is not the look I was aiming for. It is good to play with the filters. It makes you more certain with your choices next time.

I have tried POP filter (you can try it yourself), but for my purposes decided to stay with the ACCENTUATE. After you are happy with the choice of the filter, click on the check-mark button in the bottom-right.

This brings you back to the main menu. See, how the image looks different after I have applied the ACCENTUATE filter? Now it's time for the manual adjustment. Click on the EDIT button that looks like a pencil on the right-hand side.

This menu opens up a massive toolbox for all your manual tweaks. Let's use CROP tool to leave the post out of the frame.

On the bottom you can see preset frame ratios. You can stay with the original, go classic with 4:3, or be more modern with the 16:9 ratio. I picked FREE, the button on the very left, for my purpose.


The image has improved significantly, as you can see. Still, we may be able to fine tune it. Let's click on EDIT (pencil looking button) one more time.

Now click on the TUNE IMAGE button.

Tap anywhere inside the image and scroll up and down. You will see manual manipulation menu including all the main visual parameters: brightness, contrast, saturation, etc. Play with each one, picking the menu item and moving your finger or pen to the left or to the right.

In this particular case all I wanted to do was slightly dramatizing the sky, making it look darker. To do so I picked HIGHLIGHTS from the menu and moved my finger to the left until I was satisfied.
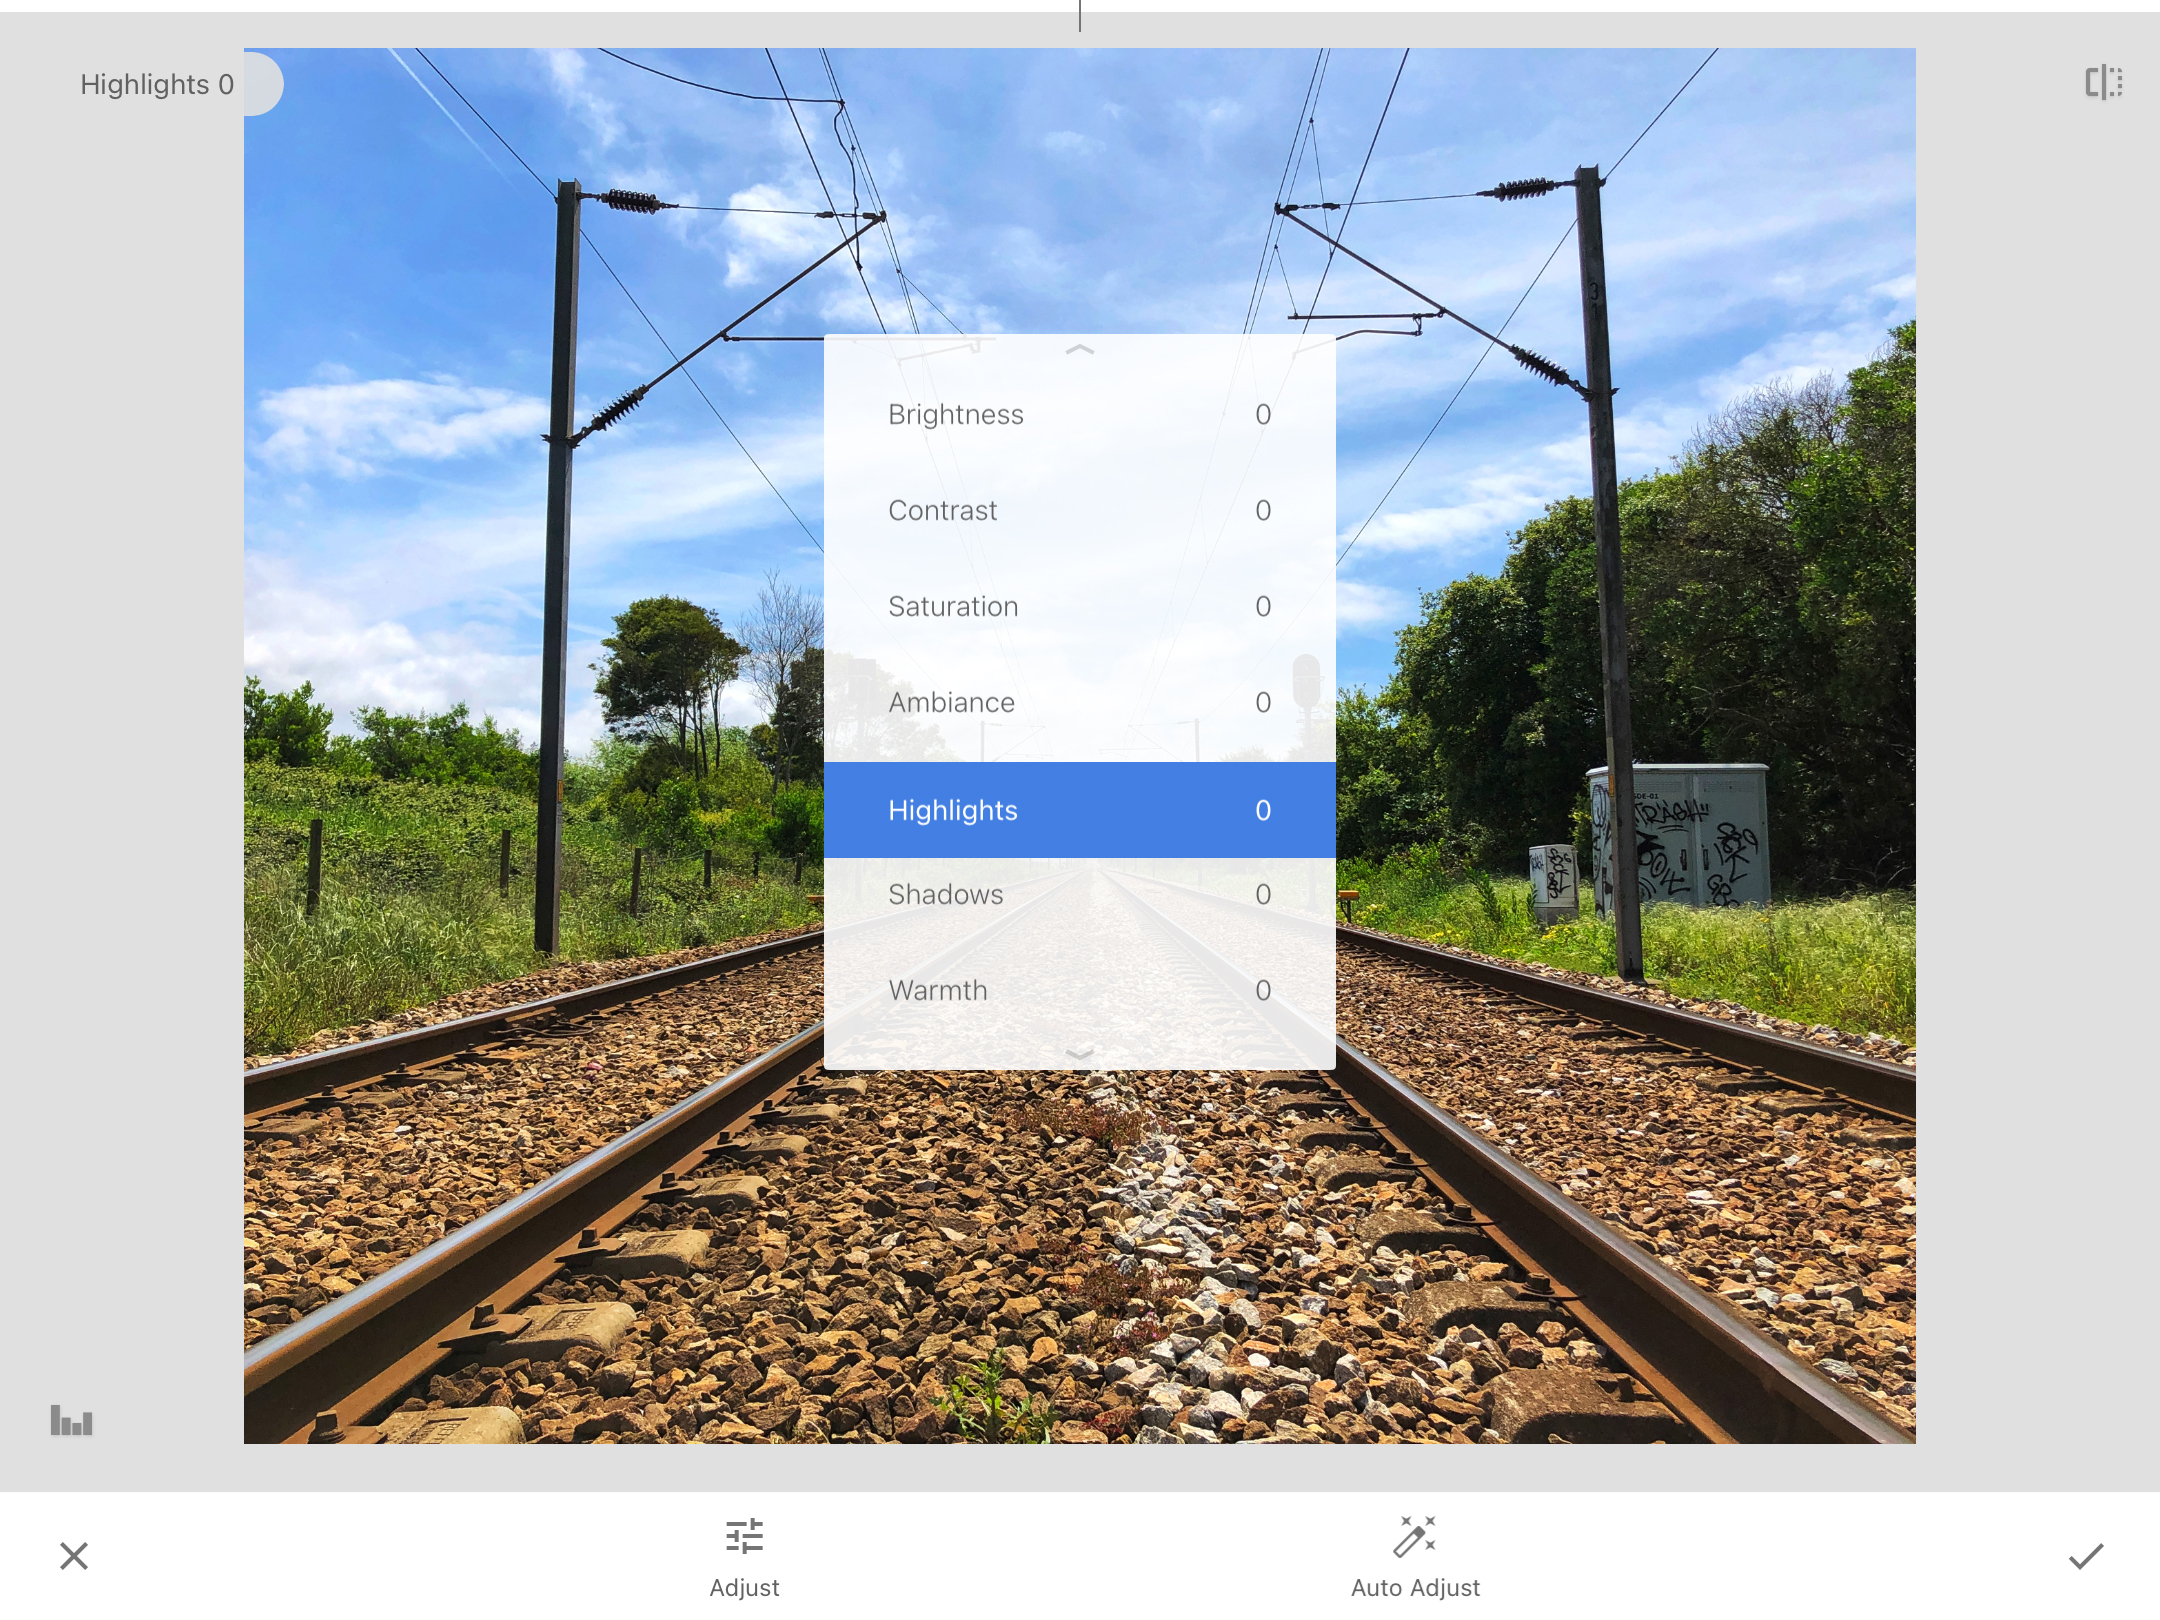
As you can see on the top, according to the reading on the blue bar I moved the highlights level down by 51 point. That was all I needed from the TUNE IMAGE feature, so I confirmed my action by clicking on the check-mark button on the bottom right.

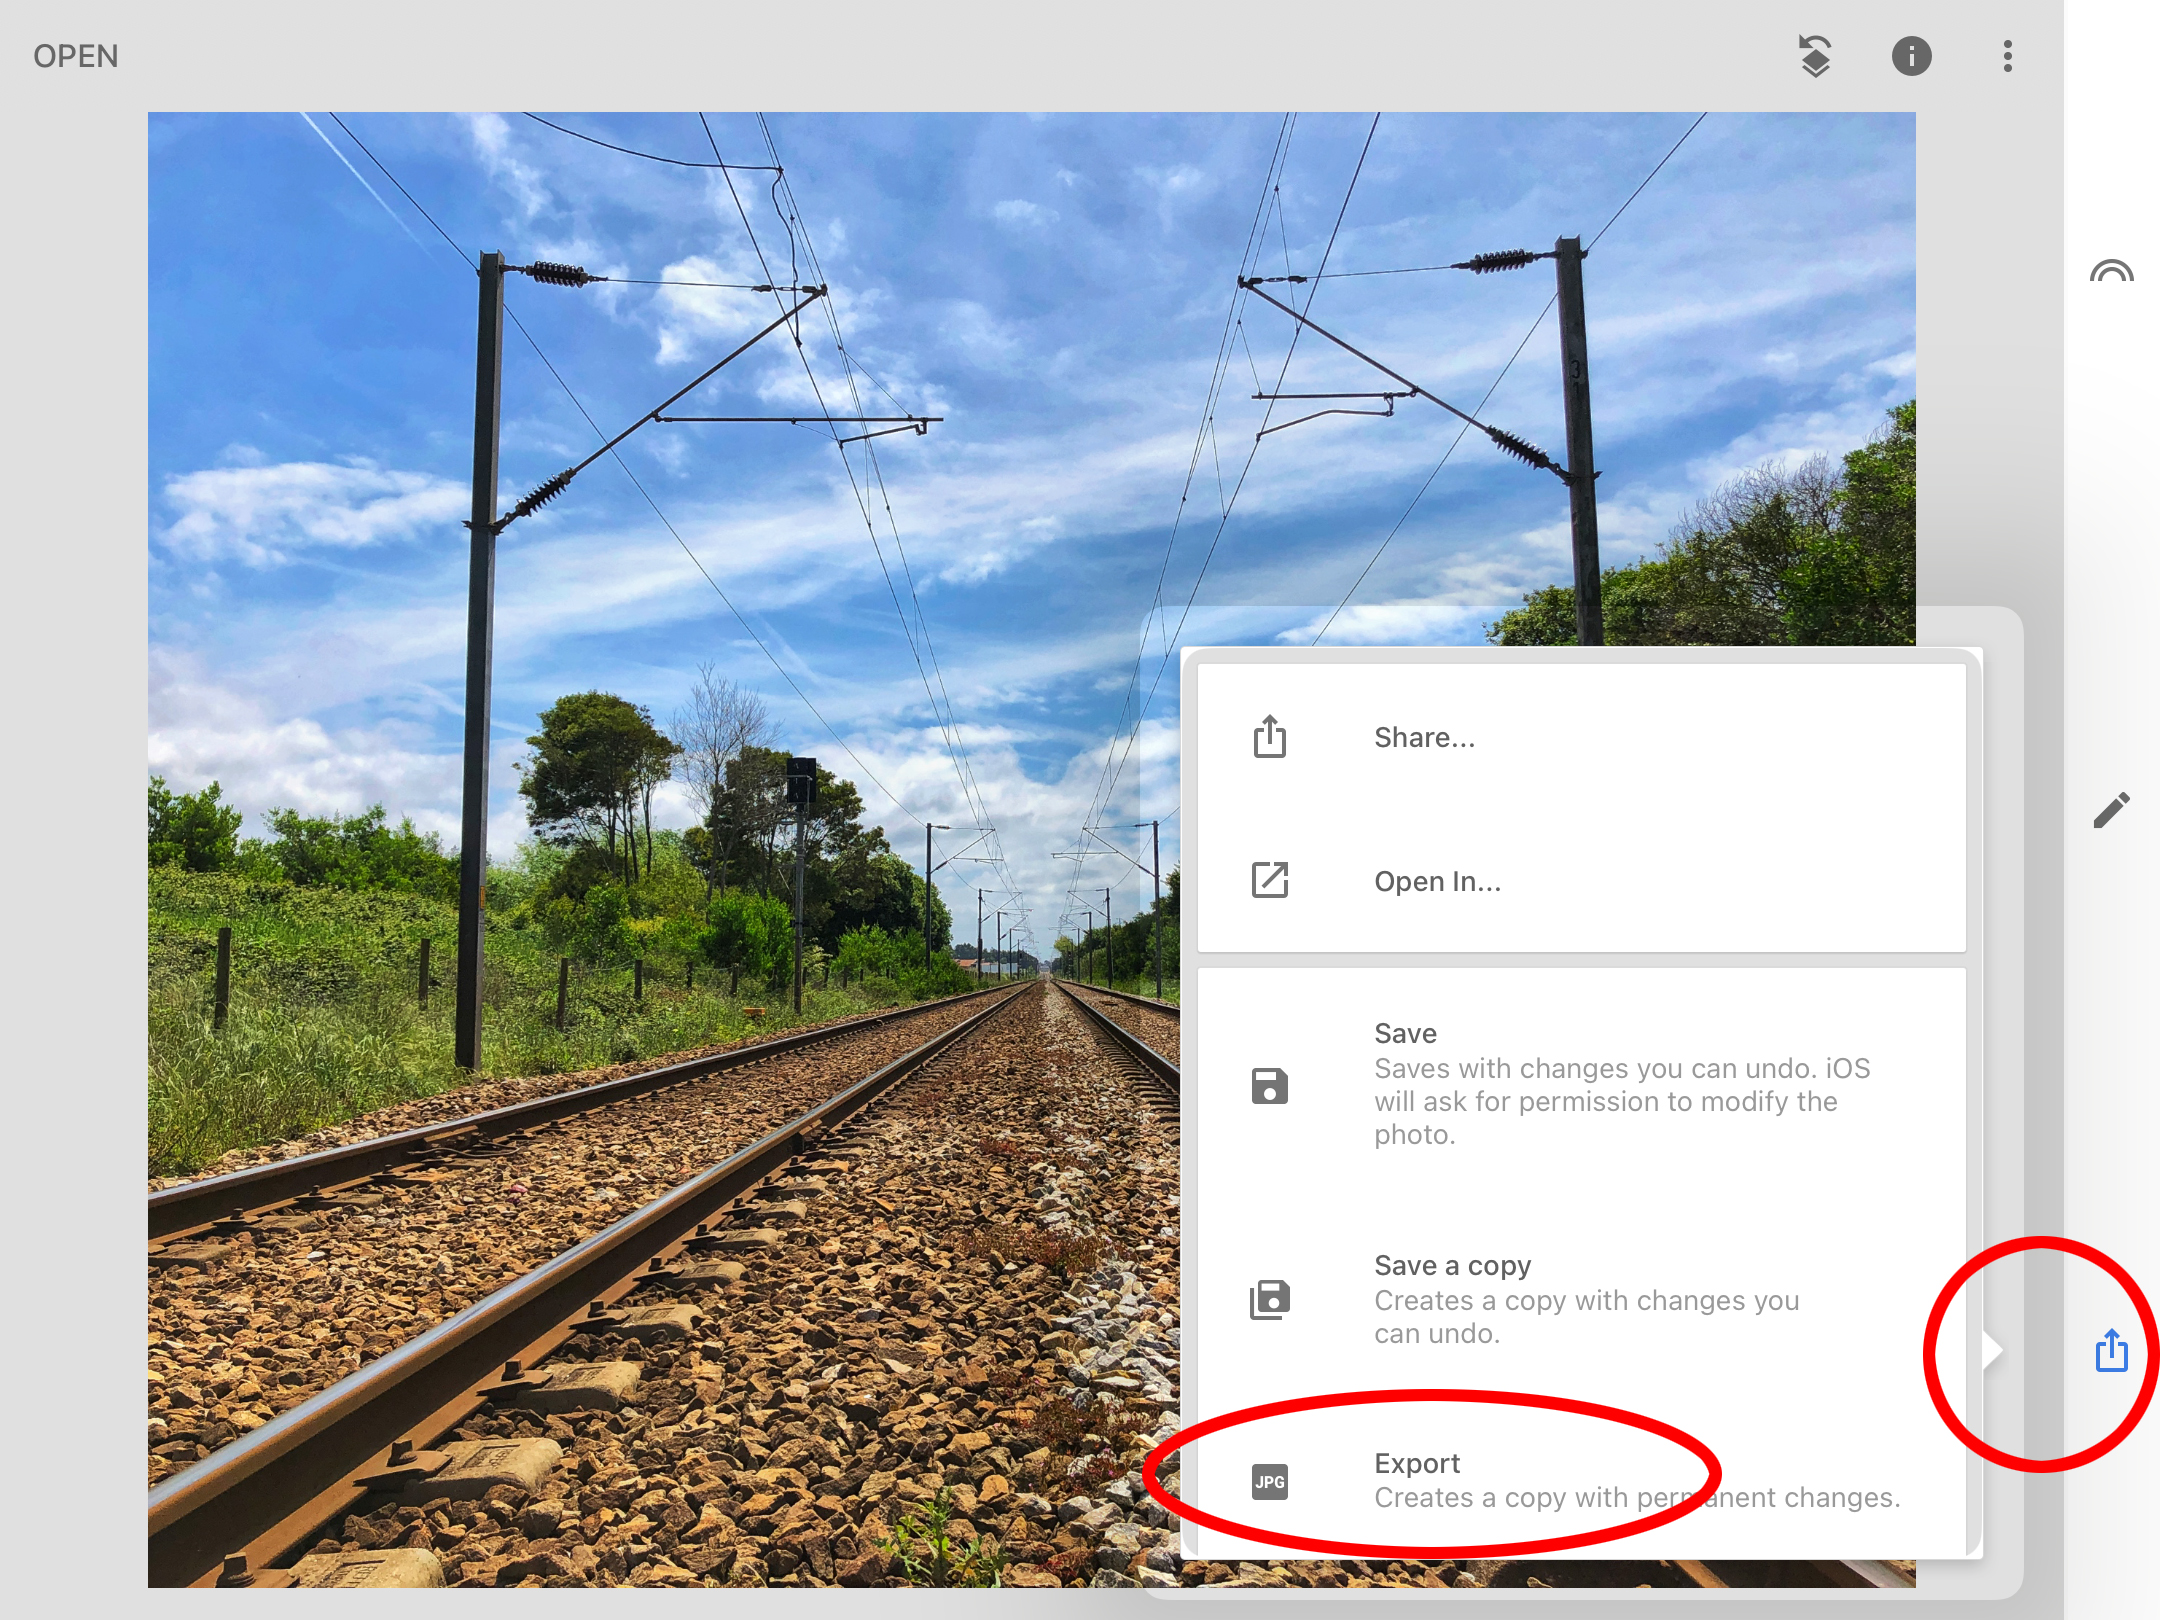
Finally we have arrived to the stage of saving the image. Clicking the OUTPUT BUTTON on the bottom right prompts the output menu. My personal choice is EXPORT on the bottom of the menu as it leaves the original image untouched and creates a new image in JPG format.
After the image has been "successfully exported", you may have a look at it in the Camera Roll app and compare it to the original. If you don't like what you see, try again.

That's all for today. Good luck with exploring the art and the science of photography.
Want to see more of what I am doing? Click here to follow me.
